This lesson is intended to be taught in the month of October, in the weeks leading up to Dia de Los Muertos.
Sequence of activities:
Preparation:
Use orange index cards or cut down orange paper to a similar size. Prepare 1-2 for each student, depending on the size of your class. Bring extra paper for students that wish to create more than one flower. Decide if your bouquet will be on a poster board (easier to assemble in class), or if you want to assemble a more life-like bouquet using hot glue and chenille stems.
Using the orange paper and a black marker, create some simple flower drawings and cut them out. (Prepare 5-10, depending on the size of your class. These will be used to supplement the bouquet.) I aim for a 3-4” flower. Here is a great tutorial for drawing a very simple cempasúchil by Drawbaron on Youtube. (You don’t need to draw the stems, only the flower.)
Introduction (15 minutes):
Begin with posing a question for students to answer: “What is an ancestor?”
Call upon students to answer, inviting other students to add to the idea of what an ancestor is. Add to the idea as necessary. Some thoughts I include are: “Ancestors are relatives who came before us, including distant relatives whose names you don’t know or know nothing about.” “As a Mexican person with indigenous heritage, I also consider the original peoples of this region and ancient Mexican peoples to be my ancestors, too.” Note that some students might be estranged to (or not comfortable with) their blood ancestry; invite students to explore non-physical and metaphorical outlooks on ancestry: "Consider your chosen ancestors: people who inspire you and whose footsteps you walk in."
Next, ask if any students are familiar with Day of the Dead (Dia de los Muertos) and invite them to share family traditions and practices they might have for that day.
Here is a definition I use to get everyone on the same page: The “Day of the Dead” is a holiday traditionally celebrated on November 1 and 2. It is widely observed in Mexico, where it largely developed.
Ask students if anyone has seen a cempasúchil (sem-pa-SOOCH-eel) flower, and where they have seen it if they have. Share some facts about why cempasúchil flowers and their role on Day of the Dead:
Cempasúchil are known as the Mexican Marigold or the Aztec Marigold. They have a distinct, sweet scent.
The Aztecs left these flowers for their ancestors and believed that ancestral spirits used the scent to find their way home from the spirit realm.
Cempasúchil are also known as “flores de los muertos” or flowers of the dead.
Cempasúchil are left in cemeteries, at graves, on ofrenda altars, and commonly used as decoration in October.
Share plenty of photos of the cempasúchil flower, including at cemeteries, on graves and on altars.
Some great places to find photos are:
Instagram: @coloralamexicana (They post photos of cempasúchil every October/early November)
NPR: Why marigolds, or cempasúchil, are the iconic flower of Día de los Muertos
Cempazuchitl Flowers
I share about 8-10 photos and invite students to share what they notice or what stands out to them.
Group Poem Writing (15 minutes):
Hand one orange piece of paper to each student. Let students know that they will be writing a group poem and that they will write one or two sentences on their orange paper. Ask students to write in the center of the paper, (on the blank side if using index cards). The idea is for each paper/card to act like a flower, and their combined responses will form a bouquet.
Their prompt is: Write something you’d like to say to your ancestors or to a loved one who has passed.
Some students may have multiple people they want to create a flower for, so they will need multiple pieces of orange paper.
Ask students to outline their text using a black marker with a ridged circle, like a flower. I like to display this drawing tutorial or image still by Drawbaron on YouTube. Next, have students cut out their flowers.
Type up the poem-fragments from their flowers to create a group poem. Share it with students at a later date! Alternatively, invite students to go around and share their responses out loud to create a spoken group poem.
Individual Writing: (optional, 15 minutes)
In middle school and high school classes, you can extend this activity by asking students to respond to the prompt in a full-length poem. Invite them to include things they’d like to share about themselves, their life, and their experiences. Invite them to tell this ancestor or loved one about difficult moments, highlights, their favorite things, goals, and things they look forward to. They can also address multiple ancestors and loved ones, if they wish.
Remind students that while it can feel odd to write to someone who has passed, they are not writing to a stranger—they are writing to someone who loves them.
Invite students to share their writing out loud. Before sharing, remind students that they will be hearing personal topics and that they should remain respectful and not repeat these things outside of class.
Bouquet Assembly (10-60 minutes):
If using a poster or posterboard, you can collect flowers and paste them with a glue stick as students are writing their individual poems, or call students up in groups to paste their flowers wherever they wish. Encourage students to paste flowers close together, to create a bouquet-like look. Use the supplemental flowers you created to make the bouquet look more full.
If assembling a life-like bouquet, prepare the stems by twisting two green chenille stems together for more stability. Leave the last ½ inch untwisted, to create a “Y” shape. Drop a glob of hot glue on the back of a “flower” and place the “Y” in the glob. You can use a pen or pencil to adjust the placement (glue will be hot!). Place the finished flowers in a flower vase and arrange them to make the writing as visible as possible. You can cut up extra green chenille stems to create bundles and help the arrangement stay in place.
The student flowers do not need to perfectly resemble a flower. The orange color and supplemental flowers will help create the illusion of a bouquet.
If your classroom or school has an ofrenda altar, this would make a great addition!
Note for Modification:
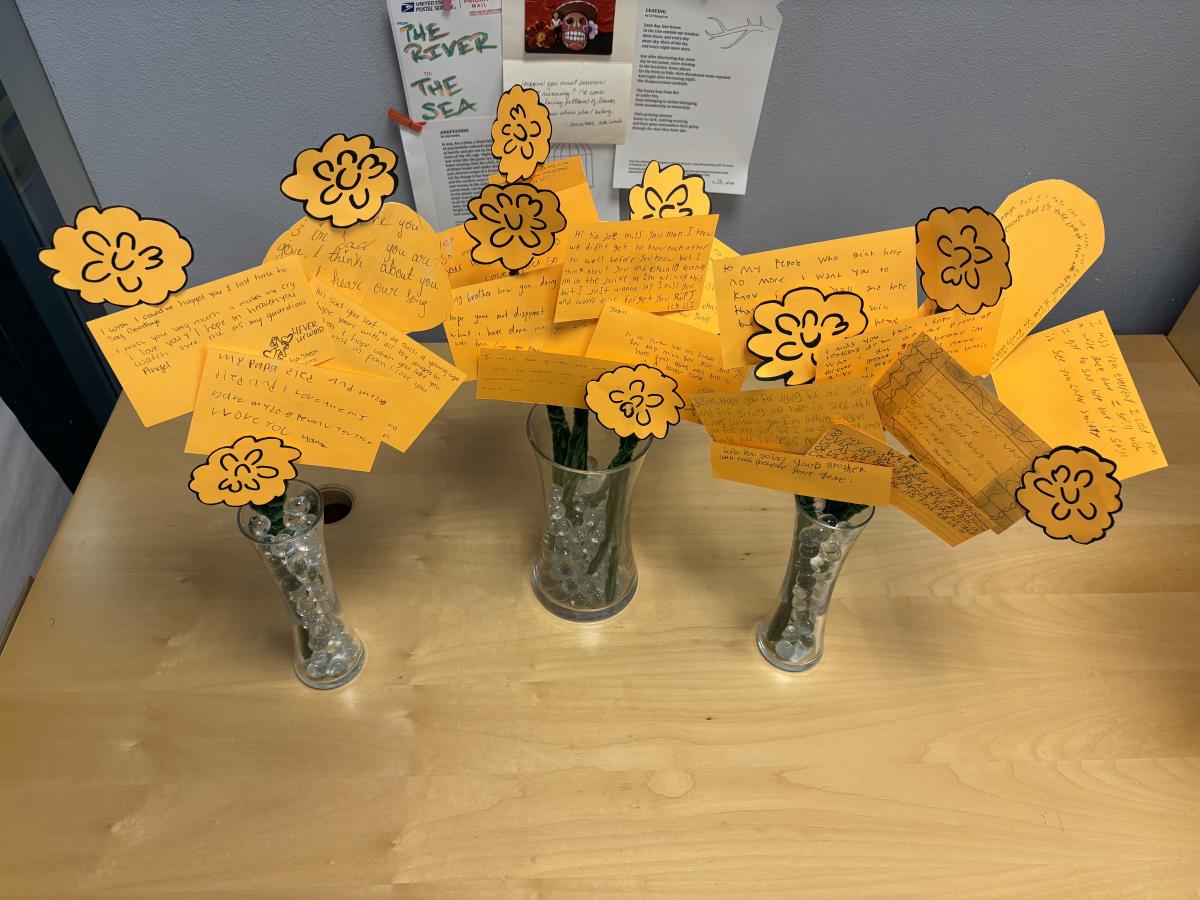
The bouquets in the photo example were made by students in detention, where supplies are very limited. The “flowers” are missing outlines and are not cut up, but the idea is still executed through the flower vase, stems, and supplemental flowers. I collected their index cards and assembled the arrangement at home. I shared the bouquet with students via photographs.
Example: